Android Studio 4.0 新功能之玩玩 Motion Editor
本来想在 Android Studio 4.0 更新介绍博客就讲一下怎么玩 Motion Editor 的,但是我发现这个完全有必要有需要再开一坑…
首先我先放上 MotionLayout 的 Android Developer 文档地址:https://developer.android.com/training/constraint-layout/motionlayout?hl=zh-cn#getting_started
这个 MotionLayout 是啥呢?它就是一个 ConstraintLayout 2.0 也就是我们所说的弹性布局新增的一个动画布局,它的作用就是更好的利用 xml 去实现 UI 交互式动画( 我觉得 Android 在动画上这几年下的功夫已经不输 ios 了,我死党说 android 动画流畅度其实已经超过 ios 了只是看起来没有 ios 的舒服,不管怎么说至少我觉得 android 动画方面这几年进步非常大 )
好了,不扯远了我们回到 MotionLayout 上面来,我这篇博客的主角 Motion Editor 其实是 android studio 4.0 更新的一个可视化 MotionLayout 编辑器…
emmm 怎么理解呢?就是用 Motion Editor 我们可以点一点按一按就能实现很多 UI 交互动画,还有实时预览功能。简直就是居家旅行必备神器… 日后可以用 Android studio 来做视频了,哈哈哈哈哈哈
当然我们先要简单了解一下 MotionLayout,首先要知道的是这个还是 ConstraintLayout beta 2.0 才出来的一个新玩意,我们当然要先用用 ConstraintLayout beta 版本才能拥有这个高科技玩意
现在导入 constraintlayout:2.0.0-beta6 我这边现在的最新版本是 beta6 然后我用的是 androidx 的库,添加到 build.gradle 文件中
dependencies {
implementation 'androidx.constraintlayout:constraintlayout:2.0.0-beta6'
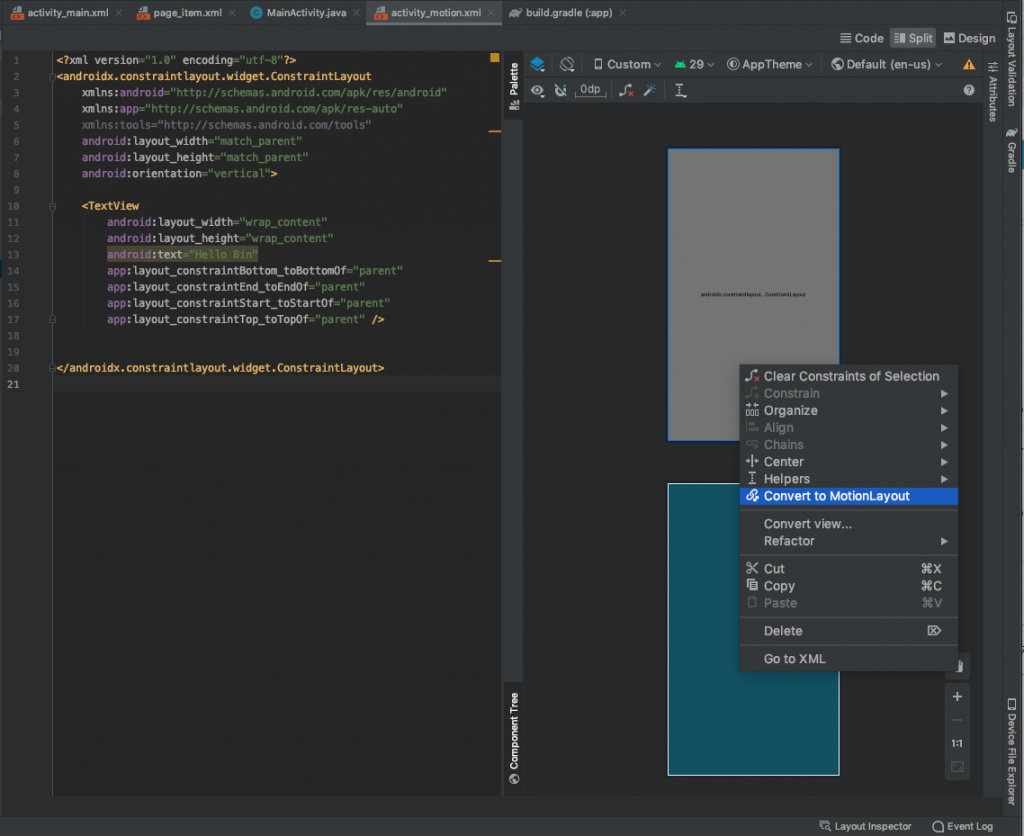
}然后我们创建一个 layuot 先创建一个 ConstraintLayout 并且放点东西,我们利用 Android studio 提供的一键转换功能帮我们转换成 MotionLayout ,下面是我写的 layout 布局文件
<?xml version="1.0" encoding="utf-8"?>
<androidx.constraintlayout.widget.ConstraintLayout
    xmlns:android="http://schemas.android.com/apk/res/android"
    xmlns:app="http://schemas.android.com/apk/res-auto"
    xmlns:tools="http://schemas.android.com/tools"
    android:layout_width="match_parent"
    android:layout_height="match_parent"
    android:orientation="vertical">

    <TextView
        android:layout_width="wrap_content"
        android:layout_height="wrap_content"
        android:text="Hello Bin"
        app:layout_constraintBottom_toBottomOf="parent"
        app:layout_constraintEnd_toEndOf="parent"
        app:layout_constraintStart_toStartOf="parent"
        app:layout_constraintTop_toTopOf="parent" />

</androidx.constraintlayout.widget.ConstraintLayout>
然后到我们的预览视图中选中 ConstraintLayout 点击鼠标右键选择 Convert to MotionLayout
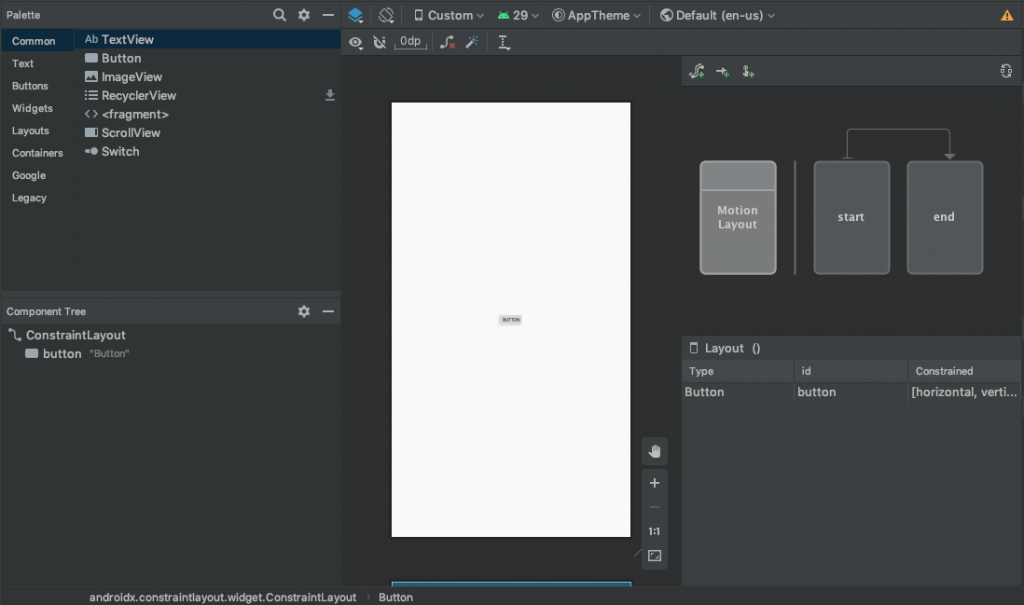
转换成功之后我们能看到 xml 目录下多了一个 xxxxxxxx_scene.xml 的文件,然后我们界面布局里写的 ConstraintLayout 也变为了 MotionLayout
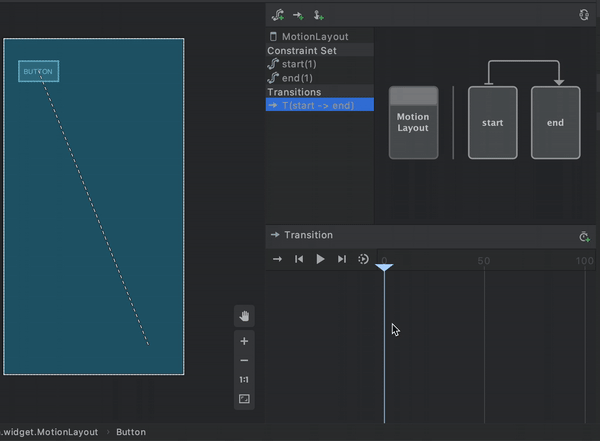
同时右边出现一个 Motion Editor 操作区域,
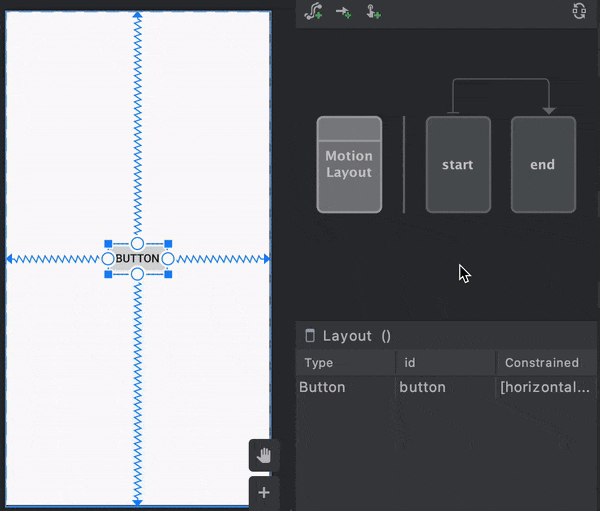
然后我们可以开始操作 ConstranintSet 的开始和结束。点击选择 start 然后把 Constraint 拉至左上,代表 MotionLayout 的起始位置。点击选择 end 然后把Constraint 拉至右下,代表 MotionLayout 的结束位置。
弄好后我们可以直接预览一下效果,点击右上角的小图标,然后选择 Transitions 后点击播放小图标可以直接预览效果
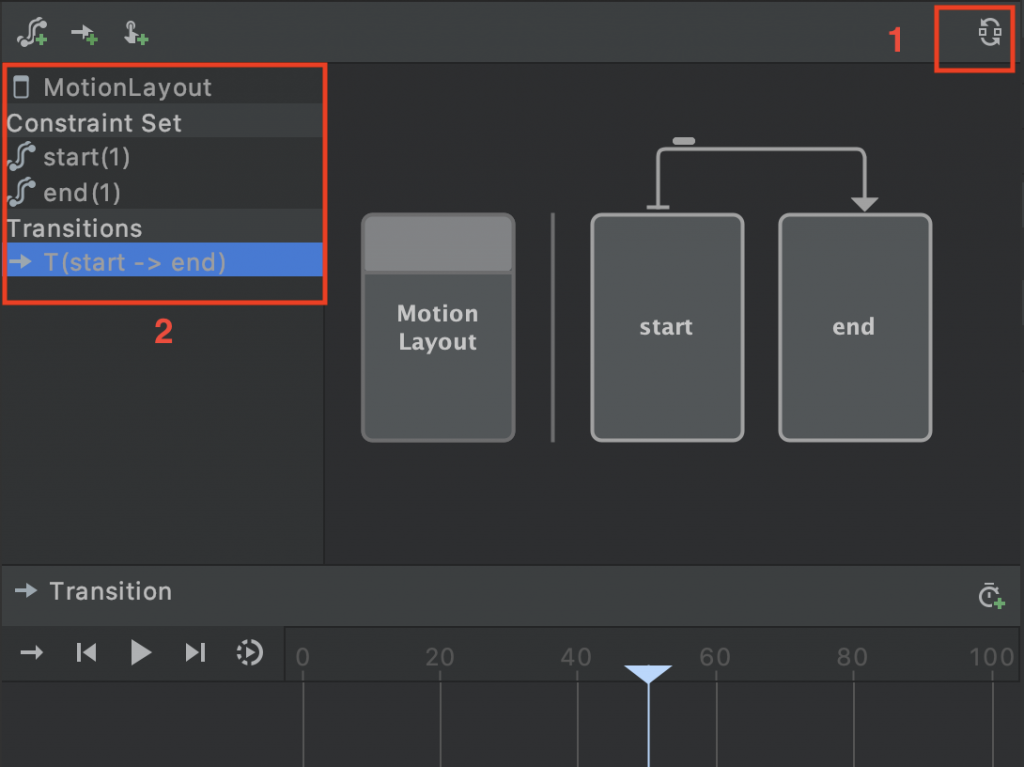
在 Transition 拖动从 0~100 可以看到左边 Constraint 的详细变化。下方的 0~100 则是代表 Transition 的从起始到结束的百分比。
那我们的 Motion Editor 先讲到这里,还有改变控件其他属性,比如放大缩小,透明啥的我在这就不一一去试了。