本文转载自 https://dianmoge.com/article/2389 ,我这里整理后再加上自己的一些见解…
准备安装
为了减少上线错误,我们保持安装版本与服务器版本一致:Nginx 1.17,PHP 7.2,MySQL 5.7
Mac电脑版本:MacOS 10.14
xcode-select --installsudo mkdir -p /data/www && sudo chmod -R 777 /data/www安装 HomeBrew
使用 Mac 的程序员必不可少的一步便是安装 Homebrew ,他就像是 centOS 的yum 命令和 ubuntu 的 apt-get 命令一样,通过 brew 命令,我们可以快速的安装一些软件包。
使用命令行安装 Homebrew 的命令如下:
/usr/bin/ruby -e "$(curl -fsSL https://raw.githubusercontent.com/Homebrew/install/master/install)"
使用 brew doctor 检查是否存在冲突,然后使用 brew update && brew upgrade 对 brew 进行升级,关于 HomeBrew 更多的使用可以看看: https://bin.zmide.com/?p=277
安装 Nginx
Nginx 在 Mac OS 中可以直接使用 brew 命令进行安装:
brew install nginx如果需要使用 80 端口的话,需要将 nginx 加入 root 组当中同时设置开机启动:
sudo cp -v /usr/local/opt/nginx/*.plist /Library/LaunchDaemons/

sudo chown root:wheel /Library/LaunchDaemons/homebrew.mxcl.nginx.plist
启动 nginx 服务:
sudo nginx测试 nginx 是否安装成功,因为默认配置文件监听的是 8080 端口,所以先对 8080 端口发起请求:
curl -IL http://127.0.0.1:8080结果应该类似于下:
HTTP/1.1 200 OK
Server: nginx/1.9.1
Date: Fri, 29 May 2015 14:50:47 GMT
Content-Type: text/html
Content-Length: 612
Last-Modified: Fri, 29 May 2015 14:40:47 GMT
Connection: keep-alive
ETag: "5444dea7-264"
Accept-Ranges: bytes
安装 PHP
PHP 在 Mac OS 中可以直接使用 brew 命令进行安装:
brew install php@7.2安装完成后,还需要将 php 加入环境变量 $PATH 当中:
# 如果使用bash的话
vim ~/.bash_profile
export PATH="/usr/local/sbin:$PATH"
source ~/.bash_profile

# 如果使用ZSH的话
vim ~/.zshrc
export PATH="/usr/local/sbin:$PATH"
source ~/.zshrc
然后可以设置 php-fpm 的开机自启动:
mkdir -p ~/Library/LaunchAgents

ln -sfv /usr/local/opt/php@7.2/homebrew.mxcl.php@7.2.plist ~/Library/LaunchAgents/

launchctl load -w ~/Library/LaunchAgents/homebrew.mxcl.php@7.2.plist
使用以下命令监测 php-fpm 是否启动成功:
lsof -Pni4 | grep LISTEN | grep php如果启动成功应当有以下类似输出 ( 用户不同可能有较小的差异 ) :
bindeMac:~ bin$ sudo lsof -Pni4 | grep LISTEN | grep php-fpm
php-fpm    589           bin    9u  IPv4 0x6e563ff015250729      0t0  TCP 127.0.0.1:9000 (LISTEN)
php-fpm    590           bin    7u  IPv4 0x6e563ff015250729      0t0  TCP 127.0.0.1:9000 (LISTEN)
php-fpm    591           bin    7u  IPv4 0x6e563ff015250729      0t0  TCP 127.0.0.1:9000 (LISTEN)
安装 MySQL
通过 brew 命令进行 MySQL 安装:
brew install mysql@5.7同样,可以设置 MySQL 的开机自启动:
ln -sfv /usr/local/opt/mysql@5.7/*.plist ~/Library/LaunchAgents

launchctl load ~/Library/LaunchAgents/homebrew.mxcl.mysql@5.7.plist
然后进行 MySQL 的安全安装,使用以下命令,可以更改 root 密码、删除匿名用户、关闭远程连接等:
mysql_secure_installation然后会输出以下内容:
> Enter current password for root (enter for none):  //默认没有密码,直接回车即可
> Change the root password? [Y/n]      //是否更改root密码,选择是,然后输入并确认密码
> Remove anonymous users? [Y/n]       //是否删除匿名用户,选择是
> Disallow root login remotely? [Y/n]     //是否禁止远程登录,选择是
> Remove test database and access to it? [Y/n]   //是否删除test数据库,选择是
> Reload privilege tables now? [Y/n]     //是否重载表格数据,选择是
测试数据库是否安装成功:
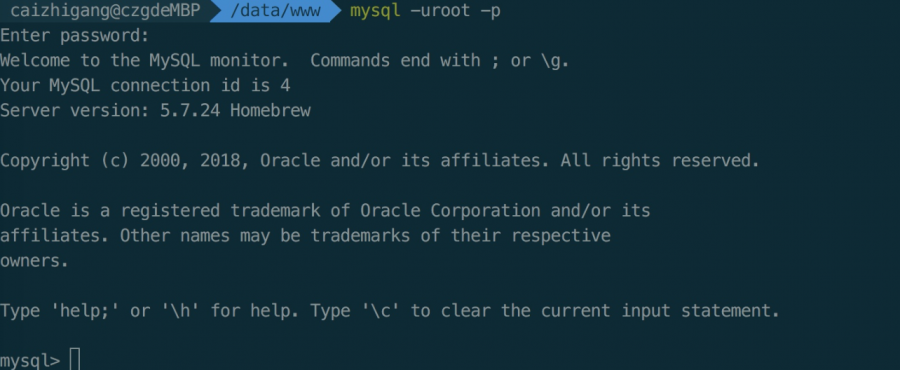
mysql -u root -p然后输入刚才设置的 root 密码,将会输出以下内容:
配置 Nginx
修改 nginx 配置文件
vim /usr/local/etc/nginx/nginx.conf
将内容替换为:
worker_processes  1;

error_log   logs/error.log  debug;


events {
    worker_connections  1024;
}


http {

    include       mime.types;
    default_type  application/octet-stream;

    server_names_hash_bucket_size 128;
    client_header_buffer_size 32k;
    large_client_header_buffers 4 32k;
    client_max_body_size 50m;
 log_format main '$remote_addr - $remote_user [$time_local] "$request" '
      '$status $body_bytes_sent "$http_referer" '
      '"$http_user_agent" "$http_x_forwarded_for"';

 access_log /usr/local/etc/nginx/logs/access.log main;

    fastcgi_connect_timeout 3000;
    fastcgi_send_timeout 3000;
    fastcgi_read_timeout 3000;
    fastcgi_buffer_size 64k;
    fastcgi_buffers 4 64k;
    fastcgi_busy_buffers_size 128k;
    fastcgi_temp_file_write_size 256k;

    sendfile        on;

    keepalive_timeout  65;

    index index.html index.php;

    include sites-enabled/*;
}
然后创建 php-fpm 配置文件:
vim /usr/local/etc/nginx/conf.d/php-fpm输入以下内容:
location ~ \.php$ {
     try_files  $uri = 404;
     fastcgi_pass 127.0.0.1:9000;
     fastcgi_index index.php;
     fastcgi_param SCRIPT_FILENAME
     $document_root$fastcgi_script_name;
     include  fastcgi_params;
}
添加一个主机 ( 这个步骤根据自己的实际情况来 ) :
vim /usr/local/ect/nginx/sites-enabled/haxibiao输入以下内容:
server {
    listen       80;

    server_name l.haxibiao.com;

    root /data/www/haxibiao.com/public;

    location / {
          try_files $uri $uri/ /index.php$is_args$args;
    }
    include /usr/local/etc/nginx/conf.d/php-fpm;
}
重启 nginx ,至此,配置完成,在 www 下写一个测试文件,进行测试即可:
sudo nginx -t

sudo nginx -s reload
安装 Composer 与 NPM
brew install composer

brew install node
配置 Git
最小化配置 Git ,根据自己的信息来:
git config --global user.name {你的名字}
git config --global user.email {公司邮箱地址}
公私钥生成:
ssh-keygen配置 config :
vi ~/.ssh/config输入以下内容:
Host git.haxibiao.com
HostName git.haxibiao.com
User git
IdentityFile ~/.ssh/id_rsa_git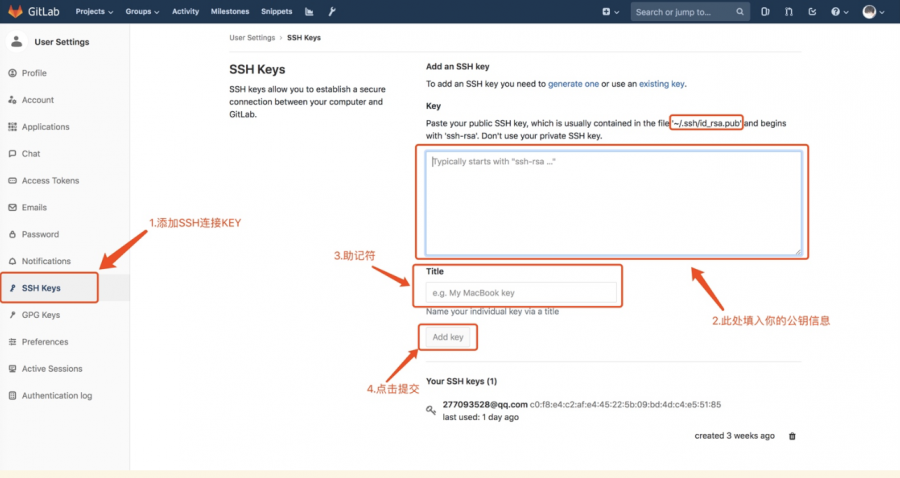
在 gitlab 账户中添加 SSH 秘钥信息:
部署项目
拉取项目:
cd /data/www && git clone git@git.haxibiao.com:web/haxibiao.com.git文件夹赋予权限:
sudo chmod -R 644 /data/www/haxibiao.com/storage && sudo chmod -R 777 /data/www/haxibiao.com/public安装项目前后端依赖包
composer install

npm install

npm run dev

cp .env.local .env
最后根据自己的实际情况配置项目信息
常见问题
访问项目 404 错误,是否配置 /etc/hosts 文件